Client, Guest and User Maintenance
- These maintenance features may only be available if the Administrator grants managers to
access these features. Each Manager may have different maintenance features. To have all of
these maintenance features, contact your Administrator.
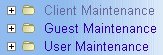
Each maintenance folder may contain the following features:
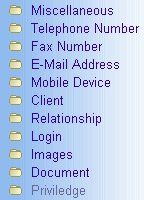
- Miscellaneous:
- This Miscellaneous feature allows you to view "Users'" Information,
set Preferences or Authenticate Images contained in the system.
Note: The "User" may stand for Client,
Guest or User.
- Information
- To view a user's information, click Information and select the desired
user to view its available detailed information.
Click here for details on viewing user's information.
- Preference
- To set preferences, click Preference.
Select a "User". Select a Document Group,
select a Document Type Code and select a Document Name.
This will bring out the file's preference page. Set the desired preferences and then save.
Note: All created Telephone Numbers, Fax Numbers, E-Mail Addresses and
Mobile Devices information will be registered here on the preference feature allowing you to
set where the documents be sent. The default preference is through Postal.
The documents may be sent through Fax, E-Mail and even through Mobile Devices like
cellphones or PDA's.
Click here for details on
setting preferences.
- Authenticate Images
- To authenticate images, click Authenticate Images and select the
desired image to authenticate.
Click here for
details on how to authenticate images.
- Telephone Number:
- This function allows you to provide telephone numbers for different users to be part of
the user's information.
- To create a telephone number file for a particular user, click to expand the
"User" Maintenance folder, expand the Telephone Number
folder and then click New. Select a user to bring out a blank form.
Fill up the form and save. A confirmation will appear if the action taken was
a success
or an error has occurred.
Click here
for details on creating a Telephone Number file.
- To modify a telephone number file, follow what you did in creating a new telephone number
file but this time click Modify. Select the desired telephone number file
you want to modify and click on it. This will bring out the file's information page.
Edit the contents and save. A confirmation will appear if the action taken was
a success
or an error has occurred.
Click here
for details on modifying a Telephone Number file.
- As for the rest; View,
Delete
and Recover,
click on the appropriate link for details.
- Fax Number:
- This function allows you to provide fax numbers for different users to be part of
the user's information.
- To create a fax number file for a particular user, click to expand the
"User" Maintenance folder, expand the Fax Number
folder and then click New. Select a user to bring out a blank form.
Fill up the form and save. A confirmation will appear if the action taken was
a success
or an error has occurred.
Click here
for details on creating a Fax Number file.
- To modify a fax number file, follow what you did in creating a new fax number
file but this time click Modify. Select the desired fax machine name file
you want to modify and click on it. This will bring out the file's information page.
Edit the contents and save. A confirmation will appear if the action taken was
a success
or an error has occurred.
Click here
for details on modifying a Fax Number file.
- As for the rest; View,
Delete
and Recover,
click on the appropriate link for details.
- E-Mail Address:
- This function allows you to provide e-mail addresses for different users to be part of
the user's information.
- To create an e-mail address file for a particular user, click to expand the
"User" Maintenance folder, expand the E-Mail Address
folder and then click New. Select a user to bring out a blank form.
Fill up the form and save. A confirmation will appear if the action taken was
a success
or an error has occurred.
Click here
for details on creating an E-mail Address file.
- To modify an e-mail address file, follow what you did in creating a new e-mail address
file but this time click Modify. Select the desired e-mail address file
you want to modify and click on it. This will bring out the file's information page.
Edit the contents and save. A confirmation will appear if the action taken was
a success
or an error has occurred.
Click here
for details on modifying an E-mail Address file.
- As for the rest; View,
Delete
and Recover,
click on the appropriate link for details.
- Mobile Device:
- This function allows you to provide mobile device numbers for different users to be part of
the user's information.
- To create a mobile device file for a particular user, click to expand the
"User" Maintenance folder, expand the Mobile Device
folder and then click New. Select a user to bring out a blank form.
Fill up the form and save. A confirmation will appear if the action taken was
a success
or an error has occurred.
Click here
for details on creating a Mobile Device file.
- To modify a mobile device file, follow what you did in creating a new mobile device
file but this time click Modify. Select the desired mobile device file
you want to modify and click on it. This will bring out the file's information page.
Edit the contents and save. A confirmation will appear if the action taken was
a success
or an error has occurred.
Click here
for details on modifying a Mobile Device file.
- As for the rest; View,
Delete
and Recover,
click on the appropriate link for details.
- "User":
- This function allows you to create, modify, move, view, delete or recover "users" who may
have access into the system.
Note:
The "User" may stand for
Client, Guest or User.
So if you are on the Client Maintenance folder, you can create, modify, move,
view, delete or recover Clients, if you are on the
Guest Maintenance, the same can be done here, create Guests,
modify, move, view, delete or recover them. This goes through with the
User Maintenance.
- To create a new "user" file, click to expand the
"User" Maintenance folder and then click New.
A blank form will appear. Fill up the form and save. A confirmation will appear if the
action taken was a success
or an error has occurred.
Click here
for details on creating a "User" file.
- To modify a "user" file, follow what you did in creating a new "user"
file but this time click Modify. Select the desired "user" file
you want to modify and click on it. This will bring out the file's information page.
Edit the contents and save. A confirmation will appear if the action taken was
a success
or an error has occurred.
Click here
for details on modifying a "User" file.
- As for the rest; Move,
View,
Delete
and Recover,
click on the appropriate link for details.
- Relationship:
- This function allows you to create, modify, view, delete or recover relationships between
"users".
Note:
The "User" may stand for
Client, Guest or User.
So if you are on the Client Maintenance folder, you can create, modify, move,
view, delete or recover Relationships between Clients,
if you are on the Guest Maintenance, the same can be done here, create
Relationships between Guests, modify, view, delete or recover
them. This goes through with the User Maintenance.
- To create a new relationship file, click to expand the
"User" Maintenance folder, expand the Relationship
folder and then click New.
A blank form will appear. Fill up the form and save. A confirmation will appear if the
action taken was a success
or an error has occurred.
Click here for details on creating a file.
Note: You need at least two (2) "users" to be
able to establish a relationship. Lesser than two will be impossible to continue.
- To modify a relationship file, follow what you did in creating a new relationship
file but this time click Modify. Select the desired relationship file
you want to modify and click on it. This will bring out the file's information page.
Edit the contents and save. A confirmation will appear if the action taken was
a success
or an error has occurred.
Click here for details on modifying a file.
- As for the rest;
View,
Delete
and Recover,
click on the appropriate function and follow the above steps.
- Login:
- This function allows you to create, modify, view, delete or recover logins for the
"users" created. This allows the created "Users" to have access to the system depending upon
the level of access a manager grants to a user.
Note:
The "User" may stand for
Client, Guest or User.
So if you are on the Client Maintenance folder, you can create, modify, move,
view, delete or recover Relationships between Clients,
if you are on the Guest Maintenance, the same can be done here, create
Relationships between Guests, modify, view, delete or recover
them. This goes through with the User Maintenance.
- To create a new login file for a particular "user", click to expand the
"User" Maintenance folder, expand the Login
folder and then click New. Select the desired available "user" and
a blank login form will appear. Fill up the form and save. A confirmation will appear if the
action taken was a success
or an error has occurred.
Click here for details on creating a file.
Note: You need at least two (2) "users" to be
able to establish a relationship. Lesser than two will be impossible to continue.
- To modify a login file, follow what you did in creating a new login
file but this time click Modify. Select the desired login file
you want to modify and click on it. This will bring out the file's information page.
Edit the contents and save. A confirmation will appear if the action taken was
a success
or an error has occurred.
Click here for details on modifying a file.
- As for the rest;
View,
Delete
and Recover,
click on the appropriate function and follow the above steps.
- Images:
- This function allows you to upload, modify, view, delete or recover images into the system
for "users".
Note:
The "User" may stand for
Client, Guest or User.
So if you are on the Client Maintenance folder, you can create, modify, move,
view, delete or recover Relationships between Clients,
if you are on the Guest Maintenance, the same can be done here, create
Relationships between Guests, modify, view, delete or recover
them. This goes through with the User Maintenance.
- To upload images into the system, click to expand the
"User" Maintenance folder, expand the Images
folder and then click New. Select the desired available
Images Group and a blank form will appear.
Search for the desired image file to be uploaded into the system and save.
A confirmation will appear if the action taken was a
success
or an error has occurred.
Click here for details on uploading
image files.
Note:
- You won't be able to upload images if there are no available
Images Group. Ask your Administrator for this feature if there are no
available images group for a particular "User" Maintenance.
- To view an image file, click its thumbnail view and the image
will be shown on the e2B Images! Browser.
- To modify an image file, follow what you did in uploading a new image
file but this time click Modify. Select the desired image file
you want to modify and click on it. This will bring out the file's information page.
Edit the contents and save. A confirmation will appear if the action taken was
a success
or an error has occurred.
Click here for details on modifying a file.
- As for the rest;
View,
Delete
and Recover,
click on the appropriate function and follow the above steps.
- Document:
- This function allows you to grant "Users" the privileges regarding documents'
access or sharing. The following privileges are:
e-doc Document Creation Privilege:
- Create e-doc Document
- Create Document Message
- Create Print Spool
- Create Fax Spool
- Create E-Mail Spool
- Create S.M.S. Spool
- Create M.M.S. Spool
- Delete e-doc Document
- Delete Document Message
e-doc Document Option:
- e-doc Text! Option: This grants users to use the
e-doc Text! Messenger feature.
Where users can send text messages with the attached document to other users.
- Sticky Notes Option: This allows users to attach personalized notes or
remarks on any document page and have the option to allow other users to view the notes or
for private/personal viewing only.
Click here
for details on using the Sticky Note feature.
- Print Option: This allow users to have documents be printed out.
- Change Preference: This allows users to modify or set preferences.
Note: The Client and
Guest Maintenance do not have the
e-doc Document Creation Privilege only the
e-doc Document Options. Only User Maintenance has both
the e-doc Document Creations Privilege and the
e-doc Document Option.
- To create a document privilege file, click to expand the
"User" Maintenance folder, expand the Document
folder and then click New.
Select a Document Group. Select a Document Type Code.
A form with radio buttons will appear. Click the appropriate radio button corresponding
the selected choice and then save when done. Provide data for the rest of fields available.
A confirmation will appear if the action taken was a
success
or an error has occurred.
Click here for details on creating a file.
Note: The "User" may stand for Client,
Guest or User.
- To modify a document privilege file, follow what you did in creating a new document
privilege file but this time click Modify. Select the desired document
privilege file you want to modify and click on it. This will bring out the file's
information page. Edit the contents and save. A confirmation will appear if the action
taken was a success
or an error has occurred.
Click here for details on modifying a file.
- As for the rest;
View,
Delete
and Recover,
click on the appropriate function and follow the above steps.
- Privilege:
- This feature allows you to grant account privilege to "Users". Where users may be able to
access different Subsidiary Accounts granted to them.
Note: The "Users" may stand for Client,
Guest or User.
- To create an account privilege file, click to expand the
"User" Maintenance folder, expand the Privilege
folder and then click New.
Select a Subsidiary Account a form with checkboxes will appear.
Click the appropriate checkbox corresponding to the selected choice and then save when done.
Provide data for the rest of fields available.
A confirmation will appear if the action taken was a
success
or an error has occurred.
Click here for details on creating a file.
Note: The "User" may stand for Client,
Guest or User.
- To modify an account privilege file, follow what you did in creating a new account
privilege file but this time click Modify. Select the desired account
privilege file you want to modify and click on it. This will bring out the file's
information page. Edit the contents and save. A confirmation will appear if the action
taken was a success
or an error has occurred.
Click here for details on modifying a file.
- As for the rest;
View,
Delete
and Recover,
click on the appropriate function and follow the above steps.
|