- This feature allows you to send messages and attach the current document page with it
to other users. To use this feature, move your cursor over the
 Text! icon and click on it.
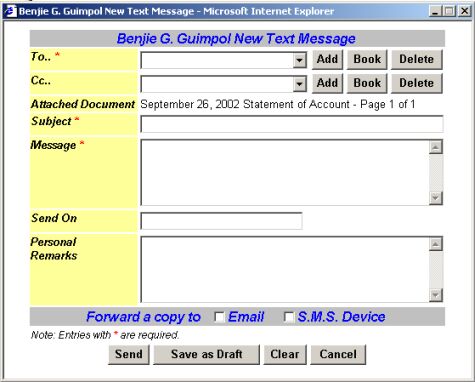
This will bring out the e-doc Text! Messenger containing the
attached page file. A sample of New Text Message with attached page file is shown below.
Text! icon and click on it.
This will bring out the e-doc Text! Messenger containing the
attached page file. A sample of New Text Message with attached page file is shown below.
- The next step for you to do is to determine who will receive your message with
the attached document file. To do this, move your cursor over the Add
button beside the To: field and click on it.
A List of User Type will appear. Select the desired User Type. Then choose the User you want
your message to be sent to. You can add as many Users as you want, just repeat the process
and then click the Exit Button when you had enough. All the Users contained in
the To: Text Box will receive your message as well as the document file attached.
Note:
- If you have more that 10 users, the
search feature
will be available. Click here for more
information about the search feature of e2B System.
- The Book button will only appear when you have saved specifically selected
the Users you only want in
your Address Book.
So you don't have to search for the entire users contained in the database.
This narrows down your selection of users.
- To delete User/s you don't want your message to be sent to, click on the drop down
list of To: field and select the desired User to be deleted.
Click the Delete Button (beside the Add Button) to remove the selected User
from the selection.
- If you want to copy furnish or make carbon copies your message to other users,
click the Add button (beside the Cc: field).
This is just like adding users from the To: field, follow the same process in
Step 2. You can leave this field blank since it is optional.
- Provide a Subject by typing on the Subject field.
This is a required field so do not leave it blank or you won't be able to send
or save the message.
- You can now type your message in the Message field. You are limited
to 512 characters, including punctuation marks and spaces.
- You can also have the option to send your message on a particular date and time.
Type in on the Send On field, the format must look something like this:
i. e. January 1, 2003 1:00 am. The message will stay in your outbox for the meantime until
the time and date you specified in the Send on field.
- You can add some Remarks too. Click here for more information on the
Remarks field.
- You can also forward a copy of your message through the designated user's E-mail
or S.M.S. Device. To do so, move your cursor on top of the Check Box beside
the E-mail or S.M.S. Device and click your left mouse button.
This will leave a check mark signifying that your message will also be forwarded to
their E-mail or Device with text messaging feature; like a cellular phone.
You can list down user's E-mail addresses or S.M.S. Device Numbers in
your Address Book.
- You can Save the created message by clicking the Save as Draft
button. The saved message will stay in the
Drafts folder
so you can send it later and have the option to edit your message.
- Click the Send button to send the message together with the document.
There is a 1 to 60 seconds delay in the sending of messages. Unsent messages can be found in
the Outbox folder.
- Click the Clear button to clear all entry boxes for new entries.
- Click the Cancel button to cancel the operation and close the
Text! Messenger window.
- Click the Help button to bring out the help guide for the current page.
|