- Print Queue function allows you to view all available document pages that are in line for
printing. You will find here the following information; Spool Date, Status, name of
e-doc Document, Page number, number of Copies to be printed, document's Owner Name, Orientation
of how the document page be printed out, Paper Size and the name of the person printing the
document page.
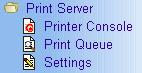
- To view available documents to be printed, click to expand the Print Server
folder and then click Print Queue. This will show
the View Print Queue page.
- On the view print queue page, you can select the status of print queue to view.
The following print queue status are:
- All Status: This is the default status which lists all print queues.
- Deleted: This shows the print queues that were deleted or the document
pages to be printed were cancelled.
- Hold: This shows document pages that were held until resumed for printing.
- Printing: This shows the document page being printed.
- Queued: This shows the documents in line for printing.
To select a status, click the drop down list and select the desired print queue status.
- To change the status of a document, click the Status, beside the
Spool Date of the selected document and this will show you the
Print Queue Information page of the document. Select the new status
from the drop down list.
After selecting the new status for the document selected, you will have the following
options:
- Click the Save button to save the new status and a confirmation will appear.
While on the confirmation page, you will have other options;
Modify Again: Click this button to modify again the current status.
View Print Queue: Click this button to go to the view print queue page.
Exit: Click this button to abort the operation and return to the welcome page
or main menu.
Help: Click this button to bring out the help guide for the current page
- Click the Back button to return to the view print queue page.
- Click the Reset button to clear the new status selection field.
- Click the Cancel button to close the view print queue page and
return to the welcome page or main menu.
- Click the Help button to bring out the help guide for the current page.
- To move to the next set of print queues, click the Next button and to
go back to the previous set, click the Previous button.
Note: The Next and Previous
buttons can only be seen when there are more than ten (10) available selections.
- Clicking the Refresh button refreshes the page and to return to the
1st set of print queues, if there are more than ten (10) available print queues.
- Click the Exit button to abort the operation and return to the
welcome page or main menu.
- Click the Help button to bring out the help guide for the current page.
- To start printing the queued documents, launch the
Printer Console and then
click the Print button.
|