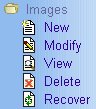
- To modify existing Image file, expand the desired Subsidiary Account folder,
expand the Images folder and click Modify.
- Select the desired Account from the available selections and modify any available Image file
for the Account selected. If there are more than ten (10) available Accounts, an extended
search engine will appear.
Click here for details
on using this search engine.
Note:
- If you do not want to use the extended search engine,
close the extended search engine and use the Next and
Previous buttons instead to navigate through the available selections.
To bring out the extended search engine, click the Search button.
- After selecting the desired Account, select from the available selections of Images Group.
If there are more than ten (10) available Images Group, an extended search engine will appear.
Click here for details
on using this search engine.
Note:
- If you do not want to use the extended search engine,
close the extended search engine and use the Next and
Previous buttons instead to navigate through the available selections.
To bring out the extended search engine, click the Search button.
- "Images" Groups are created by the Administrator. Without these
image groups, there's no way you can create image files for Account.
You need at least one (1) Image Group available for you to continue.
Ask your Administrator for this feature.
- After selecting the desired Images Group, all existing Image files contained within the
selected Images Group will be shown. If there are more than fifty (50)
available selections, a search engine will appear.
Click here for details on using
the extended search engine.
Note:
- If you do not want to use the extended search engine,
close the extended search engine and use the Next and
Previous buttons instead to navigate through the available selections.
To bring out the extended search engine, click the Search button.
- To select an Image file, click the Image File name and not the thumbnail view
of the image. Clicking the Image File Name will bring out the image's information page.
Clicking the thumbnail view of the image will bring out the
e2B Images!
browser containing the image.
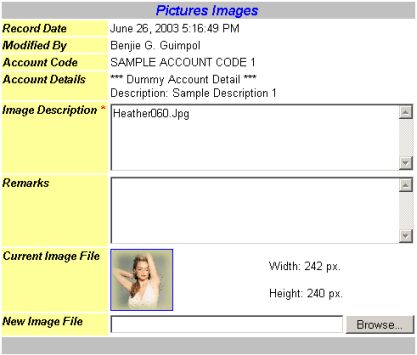
- When you arrive on the modify page of the selected image file, you can change all the
values/data you want to modify. Please take note the fields with an asterisk
(*) are required.
Fields like these that are left blank or supplied with insufficient/invalid data prohibits you
from doing any further actions (e.g. saving the document). A sample of Modify Image page is
shown below.
On the Information page, you will find the detailed information about the current Image file
with its size in pixels. Clicking the thumbnail view of the current image
file will bring out the e2B Images! Browser
containing the image. On the browser, you will not find the Next and
Previous button since there are no other available images to show. Only
the current selected image can be seen.
- To change the current image file, click the Browse button beside the
New Image File field. This will allow you to search for the new image file.
The selected new image file will be reflected on this field. You can change the Image Description
by typing the a new description for the selected new image file.
If you want to retain the current image file and you just want to change its description, you
can do so by deleting the current description and type the new description for the image file.
You are limited to a maximum of 255 characters.
- You can type some remarks or change any
existing remarks, if you like or you can just leave it blank since this is an optional field.
- When you are satisfied with the new image file, click the Save button to
update the new image file. A confirmation will appear, either the action taken was a
success or
an error has occurred.
- Clicking the Back button will take you back to the available Images
selection screen.
- Clicking the Images Group button will take you to the available Images Group
selection screen.
- Clicking the Search Images Group button will bring out the
extended search engine allowing you to
perform a specific search of Images Group available.
- Clicking the Account button will take you to the available Account
selection screen.
- Clicking the Search Account button will bring out the
extended search engine allowing you to
perform a specific search of Account available.
- Clicking the Reset button will erase or remove the recently selected image
file from the New Image File field and bring back the original image file
name on the Image Description field.
- Clicking the Cancel button aborts the operation and return to the welcome page
or main menu.
- Clicking the Help button will bring out the help guide for the current page.
Note:
- The Search Images Group and Search Account buttons
will only appear when there more than ten (10) available selections of
Images Groups and Accounts respectively. Clicking these buttons will bring
out the extended search engine
for you to search for a particular Images Group or Account respectively.
- While on the Modify Image page, you can view the current displayed image file
by clicking its thumbnail view. The Image File will be shown on the
e2B Images! Browser.
|