|
|
|||||
To add a Master Replica, go to "Master" > "Add" from the Menu Bar. See figure below.
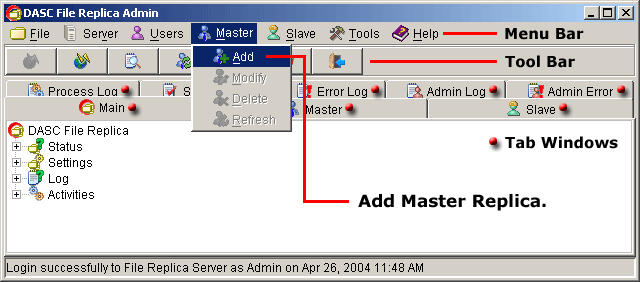
Add Master Replica
Add Master Replica Form
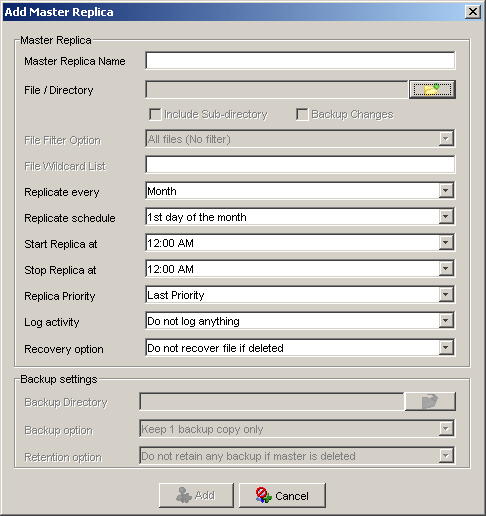
- On the "Master Replica Name" field, type the desired Master Replica
Name.
- Click the "Browse File / Directory" button and select the
file or directory you wish to backup. See figure below.
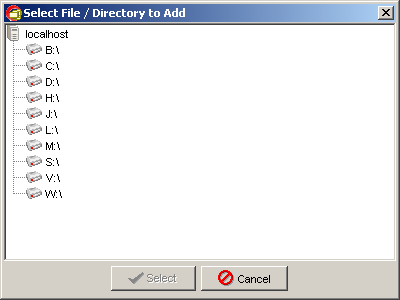
Select File / Directory to Add
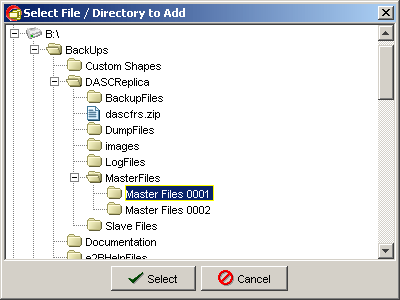
File / Directory Selected
 NOTE:
<<< Click to view note.
NOTE:
<<< Click to view note.
- Check the "Include Sub-directory" if you wish to include all the
files and sub-directory files under it.
- Check the "Backup Changes" and click "Browse" button on the
"Backup Directory" and select where you wish to keep the backups.
Set the options according to your preference.
NOTE:
<<< Click to view note.
- In the
"File Filter Option",
by default, there is no filter. If you only wish to process or exclude
certain files, select the desired filter option from the dropdown list.
- Once you have selected the desired filter option, fill up the
"File Wildcard List",
field.
- In the
"Replicate every",
field, by default, it is set to "Month", if you wish to change this option,
click the dropdown list and select the desired time of the server to process.
- In the
"Replicate schedule",
field, by default, it is set to "1st day of the month", if you wish
to change this option, click the dropdown list and select the desired day.
- In the
"Start Replica at" and
"Stop Replica at"
fields, by default, both are set to
"12:00 AM" each. If you wish to change these settings,
click the dropdown list and select the desired time.
- In the
"Replica Priority"
field, by default, it is set to "Last Priority". If you wish to
change this setting, click the dropdown list and select the desired
priority you want for the Master Replica.
- In the
"Log activity"
field, by default, it set to
"Do not log anything". If you wish to change this setting, click the
dropdown list and select the desired log activity option.
- In the
"Recovery option"
field, by default, it is set to
"Do not recover if deleted". If you wish to change this setting,
click the dropdown list and select the desired recovery option.
- Assuming you have checked the "Backup Changes" and selected the
desired "Backup Directory", the
"Backup option"
will be enabled. By default, this is set to "Keep 1 backup copy only".
To change this setting, click the dropdown list and select the desired
recovery option.
- In the
"Retention option",
by default, it is set to "Do not retain any backup if master is deleted".
To change this setting, click the dropdown list and select the desired
retention option.
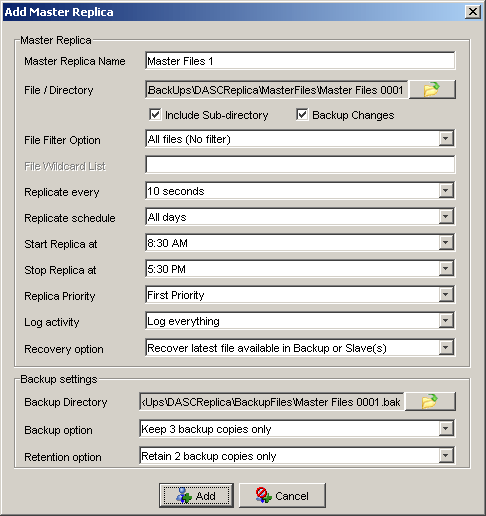
Once satisfied with your entries, click the "Add" button to save the Master Replica. Clicking the "Cancel" button will abort the operation and closes the "Add Master Replica" box.
You can verify that the Master Replica has been added at the "Main Tab Window" under "Latest Activities". See sample figure below.
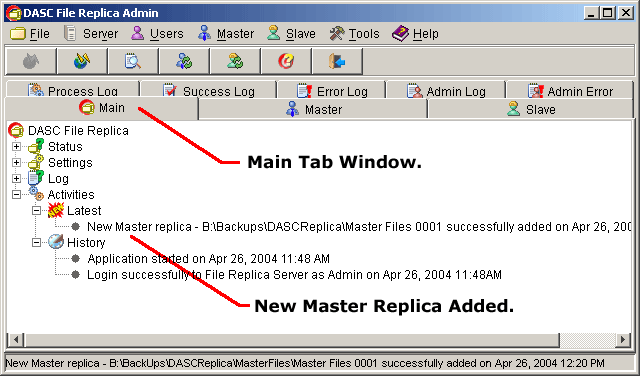
New Master Replica Successfully Added
| » | |||||