- To start creating a new List of Value file,
expand the e2B Detail! folder located on
the left menu panel.
Under the e2B Detail! folder, expand the List of Value folder.
Under List of Value, click New. This will bring out a blank form.
- Fill up the List of Value Name text field. Alphanumeric characters are allowed.
Some good examples for a name are; Gender, Marital Status, Color... etc.
But, any name is good, its just a matter of appropriateness. Up to 100 characters are allowed.
- The Value to Add. This field is where you should enter
or type the value that you want to appear under or in reference to your list of value name.
For example, you want to create a Gender list of value, what could be the possible choices?
Yes, male, female, unknown, homosexual, you name it! It will look like this;
Try clicking on it to understand more.

This is the field where you type in your value to add.
Beside this image is the output. Try clicking it.
|
|
- Ok, now that you know how it will looks like, it's time to learn how to do it.
Click on the Value to Add text field. Considering the example above,
type Male. Click the Add button. You'll be prompted to enter a value for Male.
You could click OK right away or type a value of your choice.
After clicking ok, the value "Male" will appear in the List of Values text field,
just below the Value to Add field. Note that the value highlighted will be the default value.

*** The value prompt after clicking ok.
|

*** The added value to add will appear in this field.
|
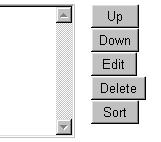
- Notice on the right side of the List of Value field are buttons. Their functions are;

|
The Up button changes the position of the highlighted value one step up.
The Down button changes the position of the highlighted value one step down.
The Edit button edits the value of the highlighted list of value.
The Delete button deletes the highlighted value from the list.
The Sort button sorts the list alphabetically.
|
- As for the rest, click the appropriate links.
Record Status,
Date Valid From,
Date Valid Until, and
Remarks.
- Once done and satisfied with your entries, click the Save button.
After doing so, a confirmation will appear either
the action taken was a success
or an error has occurred.
You will now have the option to add another or exit.
Click the Add Another button to create another list of values file
or click the Exit button to go back to the welcome screen.
- You could also clear all entered values by clicking the Clear button.
- The Cancel button takes you back to the welcome screen.
- The Help button brings out the help guide for the current page.
|